Self Hosting: Episode 2 - Firewall
Software Used:
Introduction
The firewall will separate the segments and provide protection for services that must cross the segment boundaries. To that end firewall will have several interfaces. To keep rules as manageable as possible we will treat all hosts behind each segment/interface the same. This way we should only have to really worry about the exceptions.
Build the firewall OS
The firewall will run on OpenBSD.
Hypervisor setup
We will create a VM on the hypervisor for OpenBSD. We will add it to each virtual network so it will have an interface in each one. In addition we will connect it to the external segment.
To install OpenBSD in the bhyve hypervisor first create the VM.
vm create -t openbsd77 -s 10G -m 1G -c 2 firewallNext add the different networks to the VM. This will create interfaces in the VM on the specific segments specified. Note: the order because that is the order the interfaces will show up within the guest OS.
vm add -t network -s net-external
vm add -t network -s net-iot
vm add -t network -s net-common
vm add -t network -s net-dmz
Now download the install image
vm iso https://cdn.openbsd.org/pub/OpenBSD/7.7/amd64/install77.isoOnce the download is complete. Start the VM install.
vm install firewall install77.isoand connect to the console
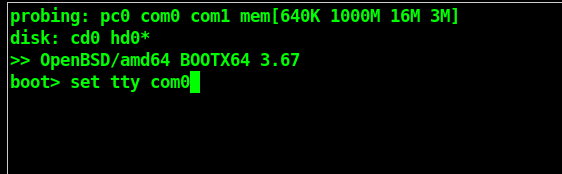
vm console firewallNow install OpenBSD like normal. One change that some may not be used to, since the VM does not have a "screen" we will need to tell the boot loader that use the TTY (com0) as the console. To do this on the boot prompt "boot>" type "set tty com0"
Now type "boot" to boot the installer. Once the boot is finished you'll be asked what you want to do. Select "I" for install and follow the prompts. OpenBSD has sensible defaults, so when in doubt, accept the default.
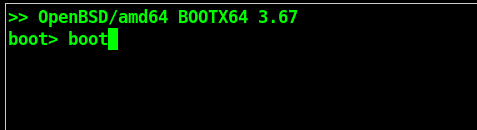
boot> boot
cannot open cd0a:/etc/random.seed: No such file or directory
booting cd0a:/7.7/amd64/bsd.rd: 4232111+1745920+3887480+0+716800 [109+483816+334631]=0xae2100
entry point at 0x1001000
Copyright (c) 1982, 1986, 1989, 1991, 1993
        The Regents of the University of California.  All rights reserved.
Copyright (c) 1995-2025 OpenBSD. All rights reserved.  https://www.OpenBSD.org

OpenBSD 7.7 (RAMDISK_CD) #613: Sun Apr 13 08:35:08 MDT 2025
    [email protected]:/usr/src/sys/arch/amd64/compile/RAMDISK_CD
real mem = 1032982528 (985MB)
avail mem = 995553280 (949MB)
random: good seed from bootblocks
mainbus0 at root
bios0 at mainbus0: SMBIOS rev. 2.8 @ 0x3fbcf000 (11 entries)
bios0: vendor BHYVE version "14.0" date 10/17/2021
bios0: FreeBSD BHYVE
efi0 at bios0: UEFI 2.7
efi0: BHYVE rev 0x10000
acpi0 at bios0: ACPI 5.1
acpi0: tables DSDT FACP APIC HPET MCFG SPCR
acpimadt0 at acpi0 addr 0xfee00000: PC-AT compat
cpu0 at mainbus0: apid 0 (boot processor)
cpu0: Intel(R) Xeon(R) CPU E5-2603 v3 @ 1.60GHz, 1597.73 MHz, 06-3f-02
cpu0: cpuid 1 edx=1f8bfbff<FPU,VME,DE,PSE,TSC,MSR,PAE,MCE,CX8,APIC,SEP,MTRR,PGE,MCA,CMOV,PAT,PSE36,CFLUSH,MMX,FXSR,SSE,SSE2,SS,HTT> ecx=f6da3203<SSE3,PCLMUL,SSSE3,FMA3,CX16,PCID,SSE4.1,SSE4.2,MOVBE,POPCNT,AES,XSAVE,AVX,F16C,RDRAND,HV>
cpu0: cpuid 6 eax=4<ARAT>
cpu0: cpuid 7.0 ebx=7a9<FSGSBASE,BMI1,AVX2,SMEP,BMI2,ERMS,INVPCID> edx=400<MD_CLEAR>
cpu0: cpuid d.1 eax=1<XSAVEOPT>
cpu0: cpuid 80000001 edx=2c100800<NXE,PAGE1GB,RDTSCP,LONG> ecx=21<LAHF,ABM>
cpu0: cpuid 80000007 edx=100<ITSC>
cpu0: MELTDOWN
cpu0: 32KB 64b/line 8-way D-cache, 32KB 64b/line 8-way I-cache, 256KB 64b/line 8-way L2 cache, 15MB 64b/line 20-way L3 cache
cpu0: apic clock running at 134MHz
cpu at mainbus0: not configured
ioapic0 at mainbus0: apid 0 pa 0xfec00000, version 11, 32 pins
acpihpet0 at acpi0: 16777216 Hz
acpiprt0 at acpi0: bus 0 (PC00)
acpipci0 at acpi0 PC00
"PNP0303" at acpi0 not configured
"PNP0F13" at acpi0 not configured
com0 at acpi0 COM1 addr 0x3f8/0x8 irq 4: ns16550a, 16 byte fifocom0: console
com1 at acpi0 COM2 addr 0x2f8/0x8 irq 3: ns16550a, 16 byte fifo
com2 at acpi0 COM3 addr 0x3e8/0x8 irq 4: ns16550a, 16 byte fifo
com3 at acpi0 COM4 addr 0x2e8/0x8 irq 3: ns16550a, 16 byte fifo
acpicmos0 at acpi0
"Bhyve_V_Gen_Counter_V1" at acpi0 not configured
cpu0: using VERW MDS workaround
pvbus0 at mainbus0: bhyve
pci0 at mainbus0 bus 0
pchb0 at pci0 dev 0 function 0 unknown vendor 0x1275 product 0x1275 rev 0x00
ahci0 at pci0 dev 3 function 0 "Intel 82801H AHCI" rev 0x00: msi, AHCI 1.3
ahci0: port 0: 6.0Gb/s
scsibus0 at ahci0: 32 targets
cd0 at scsibus0 targ 0 lun 0: <BHYVE, BHYVE DVD-ROM, 001> removable
virtio0 at pci0 dev 4 function 0 "Qumranet Virtio Storage" rev 0x00
vioblk0 at virtio0
virtio0: msix per-VQ
scsibus1 at vioblk0: 1 targets
sd0 at scsibus1 targ 0 lun 0: <VirtIO, Block Device, >
sd0: 0MB, 512 bytes/sector, 32 sectors
virtio1 at pci0 dev 5 function 0 "Qumranet Virtio Network" rev 0x00
vio0 at virtio1: 1 queue, address 58:9c:fc:00:73:1c
virtio1: msix per-VQ
virtio2 at pci0 dev 6 function 0 "Qumranet Virtio RNG" rev 0x00
viornd0 at virtio2
virtio2: msix per-VQ
"Intel 82371SB ISA" rev 0x00 at pci0 dev 31 function 0 not configured
isa0 at mainbus0
pckbc0 at isa0 port 0x60/5 irq 1 irq 12
pckbd0 at pckbc0 (kbd slot)
wskbd0 at pckbd0 mux 1
efifb at mainbus0 not configured
softraid0 at root
scsibus2 at softraid0: 256 targets
root on rd0a swap on rd0b dump on rd0b
WARNING: CHECK AND RESET THE DATE!
erase ^?, werase ^W, kill ^U, intr ^C, status ^T

Welcome to the OpenBSD/amd64 7.7 installation program.
(I)nstall, (U)pgrade, (A)utoinstall or (S)hell? i
At any prompt except password prompts you can escape to a shell by
typing '!'. Default answers are shown in []'s and are selected by
pressing RETURN.  You can exit this program at any time by pressing
Control-C, but this can leave your system in an inconsistent state.

Terminal type? [vt220]
System hostname? (short form, e.g. 'foo') firewall

Available network interfaces are: vio0 vlan0.
Network interface to configure? (name, lladdr, '?', or 'done') [vio0]
IPv4 address for vio0? (or 'autoconf' or 'none') [autoconf]
IPv6 address for vio0? (or 'autoconf' or 'none') [none]
Available network interfaces are: vio0 vlan0.
Network interface to configure? (name, lladdr, '?', or 'done') [done]

Password for root account? (will not echo)
Password for root account? (again)
Start sshd(8) by default? [yes]
Change the default console to com0? [yes]
Available speeds are: 9600 19200 38400 57600 115200.
Which speed should com0 use? (or 'done') [9600] 115200
Setup a user? (enter a lower-case loginname, or 'no') [no] alfred
Full name for user alfred? [alfred]
Password for user alfred? (will not echo)
Password for user alfred? (again)
WARNING: root is targeted by password guessing attacks, pubkeys are safer.
Allow root ssh login? (yes, no, prohibit-password) [no]
What timezone are you in? ('?' for list) [UTC]

Available disks are: sd0.
Which disk is the root disk? ('?' for details) [sd0]
Encrypt the root disk with a (p)assphrase or (k)eydisk? [no]
No valid MBR or GPT.
Use (W)hole disk MBR, whole disk (G)PT or (E)dit? [gpt]
Setting OpenBSD GPT partition to whole sd0...done.
The auto-allocated layout for sd0 is:
#                size           offset  fstype [fsize bsize   cpg]
  a:          1177.2M           532544  4.2BSD   2048 16384     1 # /
  b:           256.0M          2943424    swap
  c:         10240.0M                0  unused
  d:          3072.0M          3467712  4.2BSD   2048 16384     1 # /usr
  e:          2048.0M          9759168  4.2BSD   2048 16384     1 # /home
  i:           260.0M               64   MSDOS
Use (A)uto layout, (E)dit auto layout, or create (C)ustom layout? [a]
/dev/rsd0a: 1177.2MB in 2410880 sectors of 512 bytes
6 cylinder groups of 202.50MB, 12960 blocks, 25920 inodes each
/dev/rsd0e: 2048.0MB in 4194304 sectors of 512 bytes
11 cylinder groups of 202.50MB, 12960 blocks, 25920 inodes each
/dev/rsd0d: 3072.0MB in 6291456 sectors of 512 bytes
16 cylinder groups of 202.50MB, 12960 blocks, 25920 inodes each
/dev/sd0a (bc82b06ecfc64241.a) on /mnt type ffs (rw, asynchronous, local)
/dev/sd0e (bc82b06ecfc64241.e) on /mnt/home type ffs (rw, asynchronous, local, nodev, nosuid)
/dev/sd0d (bc82b06ecfc64241.d) on /mnt/usr type ffs (rw, asynchronous, local, nodev)

Let's install the sets!
Location of sets? (cd0 disk http nfs or 'done') [cd0]
Pathname to the sets? (or 'done') [7.7/amd64]

Select sets by entering a set name, a file name pattern or 'all'. De-select
sets by prepending a '-', e.g.: '-game*'. Selected sets are labelled '[X]'.
    [X] bsd           [X] base77.tgz    [X] game77.tgz    [X] xfont77.tgz
    [X] bsd.mp        [X] comp77.tgz    [X] xbase77.tgz   [X] xserv77.tgz
    [X] bsd.rd        [X] man77.tgz     [X] xshare77.tgz
Set name(s)? (or 'abort' or 'done') [done]
Directory does not contain SHA256.sig. Continue without verification? [no] yes
Installing bsd          100% |**************************| 31152 KB    00:09
Installing bsd.mp       100% |**************************| 31257 KB    00:09
Installing bsd.rd       100% |**************************|  4687 KB    00:01
Installing base77.tgz   100% |**************************|   483 MB    03:01
Extracting etc.tgz      100% |**************************|   275 KB    00:00
Installing comp77.tgz   100% |**************************| 81731 KB    00:38
Installing man77.tgz    100% |**************************|  8265 KB    00:04
Installing game77.tgz   100% |**************************|  2746 KB    00:01
Installing xbase77.tgz  100% |**************************| 60706 KB    00:26
Extracting xetc.tgz     100% |**************************|  8474       00:00
Installing xshare77.tgz 100% |**************************|  4554 KB    00:03
Installing xfont77.tgz  100% |**************************| 23021 KB    00:08
Installing xserv77.tgz  100% |**************************| 20074 KB    00:08
Installing BUILDINFO    100% |**************************|    54       00:00
Location of sets? (cd0 disk http nfs or 'done') [done]
Saving configuration files... done.
Making all device nodes... done.
Multiprocessor machine; using bsd.mp instead of bsd.
fw_update: add intel; update none
Relinking to create unique kernel... done.

CONGRATULATIONS! Your OpenBSD install has been successfully completed!

When you login to your new system the first time, please read your mail
using the 'mail' command.

Exit to (S)hell, (H)alt or (R)eboot? [reboot] halt
syncing disks... done

The operating system has halted.
Please press any key to reboot.
Once the VM has been installed break out of the console using ~. escape. This will take you back to a the hypervisor. From the hypervisor make sure the VM is halted using the 'vm list' command. The state should be "Stopped"
root@hyperv01:/data01/vms # vm list
NAME      DATASTORE  LOADER  CPU  MEMORY  VNC  AUTO  STATE
firewall  default    uefi    2    1G      -    No    Stopped
If not, then use the 'vm poweroff firewall' command to stop the VM.
Now that OpenBSD has been installed on the VM, restart the VM using the 'vm start firewall' command.
Firewall Setup
The firewall needs to be able to route packets. Edit the /etc/sysctl.conf file to enable IP forwarding.
net.ip.forwarding=1
net.ip6.forwarding=1
/etc/sysctl.conf
Next we will setup the /etc/pf.conf and other firewall config files. First we will create a directory to keep the files organized.
mkdir /etc/pf.dSince we want to treat each segment/interface the same we will make use of tags to help organize the traffic. The way tags work is traffic is matched and tagged on input. The tag can then be used to allow/deny the traffic on exit.
One thing to note with PF rules, they are processed in what is called "last match". Meaning that the last matching rule for a packet is the action that is taken. With this in mind we will specify the general actions at the top of the rule file and then get more specific at the end of the rule file.
The following files will be used to start. We will update the files as required.
# IOT Segment
anchor iot on IOT {
  match in tag IOT
}
/etc/pf.d/pf.anchor.iot
# Common Segment
anchor common on COMMON {
  match in tag COMMON
  deny out tagged IOT
  deny out tagged DMZ
}
/etc/pf.d/pf.anchor.common
# DMZ Segment
anchor dmz on DMZ {
  match in tag DMZ
  deny out tagged IOT
}
/etc/pf.d/pf.anchor.dmz
# External Segment
anchor external on EXTERNAL {
  deny in drop
  deny out drop
  deny out tagged IOT return
  # NAT outbound traffic to external interfaces
  pass out tagged { DMZ, COMMON } nat-to ($extif)
}
/etc/pf.d/pf.anchor.extranet
And finally create the /etc/pf.conf file.
# pf.conf
#

####
#### MACROS
####
ext_if="vio0"

# skip internal interfaces
set skip on lo
set skip on enc
set state-defaults pflow

table <all_nets> { 192.168.0.0/16 }
table <all6_nets> { 2001:db8::/32 }

####
#### Common RULES
####
# default block.  Remove log once all rules are sorted
block log
# capture NTP from any internal sources and respond for them
pass in proto udp from <all_nets> to port 123 rdr-to 127.0.0.1 port 123
pass in inet6 proto udp from <all6_nets> to port 123 rdr-to ::1 port 123
# Allow Neighbor solicitations
pass in quick on $ext_if inet6 proto icmp6 all icmp6-type { routeradv neighbrsol neighbradv }
# Allow DHCPv6
pass in quick on $ext_if inet6 proto udp \
	from fe80::/10 port dhcpv6-server \
	to fe80::/10 port dhcpv6-client no state
# Allow ping????
#pass in  quick on $ext_if inet6 proto icmp6 all icmp6-type echoreq
# Allow Link Local communications
pass in  quick on $ext_if inet6 proto icmp6 from fe80::/10 to fe80::/10
pass in  quick on $ext_if inet6 proto icmp6 from ff02::/16 to fe80::/10
pass out quick on $ext_if inet6 proto icmp6 from fe80::/10 to ff02::/16

# Include the anchor rules
include "/etc/pf.d/pf.anchor.common"
include "/etc/pf.d/pf.anchor.iot"
include "/etc/pf.d/pf.anchor.dmz"
include "/etc/pf.d/pf.anchor.external"
/etc/pf.conf
Once all the rules are in place we can test them using the pfctl(8) command.
pfctl -nf /etc/pf.confAny errors, typo, etc will be displayed. They will need to be fixed before the rules can be in place.
Adding the -v flag will show an output of all the rules.
Finally...
Once the rules are loading successfully, the firewall can be rebooted to make sure the rules are applied automatically.
rebootConclusion
This will get the basic firewall up and running. We will be revisiting the firewall config as we build out more of the environment.